Return to Karazhan

Return to Karazhan

Dungeon ID: 860

Legion · Dungeon · Requires level 1

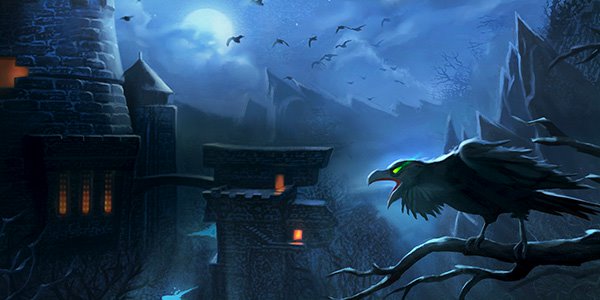
From the moment of its mysterious creation, the purpose of this dark tower has been intertwined with the history of the Guardians of Tirisfal, once Azeroth's greatest bulwark against the Legion. It is now best known as the home of Medivh, who tragically betrayed Azeroth and brought the unbroken chain of Guardians to an end. This legacy makes Karazhan a place of particular interest for the Legion, who have descended in full force in an effort to open a new front in their war on the denizens of Azeroth.

Encounters

Opera Hall: Wikket

Copied!

Are villains born evil, or do they fall into wickedness due to the influence of others? Perhaps considering this quandary from the hozen point of view will offer enlightenment...

Overview
Avoid Galindre's [Magic Magnificent] by using the vortices left over from Elfyra's [Defy Gravity].
Tanks
• Move out of [Wondrous Radiance] when it appears below you.
Damage Dealers
• Kill off Winged Assistants summoned by [Summon Assistants] to avoid being overrun.
Healers
• Expect a spike in healing needed if the tank does not avoid [Wondrous Radiance]. • While there are Winged Assistants alive, the entire party will be taking damage and need healing.
Wikket Bond
Damage dealt is shared between Elfyra and Galindre.
Elfyra
Dreary Bolt
Summon Assistants
Winged Assistant
Throw "Stuff"
Defy Gravity
Defy Gravity
Galindre
Flashy Bolt
Wondrous Radiance
Magic Magnificent

Opera Hall: Westfall Story

Copied!

Amidst the carnage of rival gangs battling for the turf of Westfall, two lovers from very different worlds fight for happiness. It is said that love is blind... but does it also need a translator?

Overview
The Defias Brotherhood and The Fins attack separately, culminating in a finale with Toe Knee and Mrrgria.
Damage Dealers
• Defeat the Gang Ruffians and Shoreline Tidespeakers first to reduce the danger to your party. • Move away from other party members when [Thunder Ritual] is about to expire.
Healers
• Players struck by [Poisonous Shank] will require extra attention. • Move away from other party members when [Thunder Ritual] is about to expire.
Tanks
• Back up when Toe Knee casts [Burning Leg Sweep] to avoid being stunned. • Move away from other party members when [Thunder Ritual] is about to expire.
Stage One: Defias Brotherhood
Toe Knee
Dashing Flame Gale
Flame Gale
Burning Leg Sweep
Gang Ruffian
Poisonous Shank
Stage Two: The Fins
Mrrgria
Thunder Ritual
Wash Away
Shoreline Tidespeaker
Bubble Blast
Stage Three: Somewhere
Toe Knee
Dashing Flame Gale
Flame Gale
Burning Leg Sweep
Mrrgria
Thunder Ritual
Wash Away

Opera Hall: Beautiful Beast

Copied!

Cursed to take the form of a beastly monster, Brute must find true love before he loses his life to the dark magic that transformed him. Will he learn proper table manners in time to win the heart of the fair Bella?

Overview
Coggleston, along with the other castle servants, protects Bella and prevents any would-be interlopers from obstructing true love.
Damage Dealers
• Interrupt Luminore's [Heat Wave] to help the party's survivability. • Try not to lead Babblet through [Burning Blaze] to prevent her from gaining [Sultry Heat]. • Use [Drenched] to clear up [Burning Blaze] if it gets out of hand.
Healers
• Try not to lead Babblet through [Burning Blaze] to prevent her from gaining [Sultry Heat]. • Use [Drenched] to clear up [Burning Blaze] if it gets out of hand.
Tanks
• Be careful when Coggleston uses [Dent Armor], as it can be very dangerous. • Interrupt Coggleston's [Dinner Bell!] whenever possible.
Eminence
Luminore
Luminore, the noble candle keeper and light bearer, has been forced into the form of a lowly kobold by a mysterious curse.
Burning Blaze
Heat Wave
Mrs. Cauldrons
A chef of singular talent, Mrs. Cauldrons has been terribly transformed into a simple pot by evil magics.
Soup Spray
Drenched
Leftovers
Babblet
Once a head maid of striking grace, Babblet is now magically trapped in the form of a broom.
Severe Dusting
Sultry Heat
Coggleston
The most loyal of castle denizens, Coggleston has been cursed into the form of a stove by an evil witch.
Spectral Service
Dent Armor
Dinner Bell!
Kara Kazham!
Silver Forks
Bloody forks... who would have imagined?
Bloody Jab
Flashing Forks

Maiden of Virtue

Copied!

Arriving in Karazhan to cleanse the tower of vice and corruption, the titan watcher was infuriated by Medivh's infamous parties and debaucheries. As her crusade for virtue seeks converts to her cause, the Maiden remains committed to purging immorality using all the powers at her disposal.

Overview
The Maiden of Virtue will place patches of [Sacred Ground] underneath players which will slowly expand and inflict damage to players who enter. She will later cast [Mass Repentance], which places a stun on the entire group that breaks on damage taken. She then protects herself with [Holy Bulwark], which players must damage her to remove, and casts [Holy Wrath], which players should interrupt after removing [Holy Bulwark].
Tank
• [Holy Shock] will deal increasing damage if not interrupted. • Stand near a growing patch of [Sacred Ground] when Maiden of Virtue casts [Mass Repentance]. • When Maiden of Virtue is protected by [Holy Bulwark], damage her to remove it and then interrupt [Holy Wrath].
Healer
• [Holy Shock] will deal increasing damage to the tank if not interrupted. • Avoid standing near other players to minimize [Holy Bolt] chaining. • Stand near a growing patch of [Sacred Ground] when Maiden of Virtue casts [Mass Repentance].
Damage Dealers
• Avoid standing near other players to minimize [Holy Bolt] chaining. • Stand near a growing patch of [Sacred Ground] when Maiden of Virtue casts [Mass Repentance]. • When Maiden of Virtue is protected by [Holy Bulwark], damage her to remove it and then interrupt [Holy Wrath].
Holy Bolt
Holy Shock
Sacred Ground
Mass Repentance
Holy Bulwark
Holy Wrath

Attumen the Huntsman

Copied!

Once charged with hunting game for his master's feasts, Attumen now sets his sights on a very different kind of quarry. Ever wary of those seeking to steal his famed steed, Midnight, Attumen unleashes his well-honed fighting skills against all intruders.

Overview
Attumen fights from the saddle until Midnight has her health reduced to 50%. At this point Midnight and Attumen will fight separately for a short while. Midnight will regain her health, then Attumen will remount and fight from the saddle once again.
Tanks
• While on foot, Attumen will constantly hit you with [Mortal Strike]. • Reposition Attumen so you and your Melee Damage Dealers can easily avoid Midnight's [Mezair]. • You will need the aid of your allies to survive [Shared Suffering].
Damage Dealers
• Attumen is untargetable while riding Midnight. • [Mighty Stomp] will interrupt all spellcasting. • You will need to stand by your tank to help them survive [Shared Suffering].
Healers
• Pay close attention to which player truly has the [Intangible Presence] haunting them and dispel that player. • [Mighty Stomp] will interrupt all spellcasting. • You will need to stand by your tank to help them survive [Shared Suffering].
Horse and Rider as One
Attumen begins the fight astride his faithful steed, Midnight.
Intangible Presence
Mighty Stomp
Spectral Charge
Fighting on Foot
When Midnight has her health reduced, Attumen dismounts and fights on foot until Midnight's health regenerates.
Mezair
Mortal Strike
Shared Suffering

Moroes

Copied!

Moroes, the steward of Karazhan, dotes upon his master's dinner guests within the grand Banquet Hall. Eternally devoted to the care of the tower, he dispatches impolite party crashers with cruel efficiency.

Overview
As the fight progresses, Moroes uses [Garrote] to continously spread damage across the party. Moroes casts [Ghastly Purge] at 60% health, making all his dinner guests immune to crowd control abilities.
Damage Dealers
• Kill the additional dinner guests before Moroes uses [Ghastly Purge] to make them immune to stuns and bonds. • Use [Ghost Traps] on Moroes' dinner guests.
Healers
• Tanks take increased damage when effected by [Coat Check]. • Moroes uses [Garrote] to spread damage throughout the party. • Use [Ghost Traps] on Moroes' dinner guests.
Tanks
• Use cooldowns when effected by [Coat Check].
Ghost Trap
Moroes
Vanish
Garrote
Coat Check
Ghastly Purge
Moroes' Dinner Guests
Dinner Party
Baroness Dorothea Millstipe
Arcane Blast
Mana Drain
Lady Catriona Von'Indi
Smite
Healing Stream
Baron Rafe Dreuger
Iron Whirlwind
Lady Keira Berrybuck
Empowered Arms
Lord Robin Daris
Whirling Edge
Lord Crispin Ference
Will Breaker

The Curator

Copied!

The Curator safeguards the Menagerie from unwelcome guests, terminating trespassers who seek to plunder the secrets of Karazhan. Though assembled by Medivh himself, the guardian construct has deteriorated over time, becoming prone to energy overloads and erratic behavior.

Overview
The Curator loses mana as it casts spells to strike its foes. When it reaches 10% mana, it will cease attacking and rapidly regenerate its mana. While it does so, it is very vulnerable to player attacks.
Tanks
• The Curator targets you with [Power Discharge]. Place damaging area effects strategically.
Damage Dealers
• Focus fire Volatile Energy before its [Arc Lightning] becomes unmanageable for healers. • The Curator is at its most vulnerable when it casts [Evocation].
Healers
• The Curator inflicts heavy damage with [Overload] after finishing [Evocation].
Actively Attacking
Summon Volatile Energy
Volatile Energy
Arc Lightning
Static Charge
Power Discharge
Regenerating Mana
Evocation
Overload

Shade of Medivh

Copied!

So great was the power of the Last Guardian, Medivh, that his magic still echoes through the halls of Karazhan. Some of these echoes take the shape of visions, revealing past events to the tower's guests. Others assume more malevolent forms, recalling a time when the Guardian's will was not his own.

Overview
Medivh assaults players with [Piercing Missiles], [Inferno Bolt] and [Frostbite] until he reaches full mana. Once he has reached full mana he uses one of his Focused Power abilities. Players must stop all movement when [Flamewreath] is cast.
Damage Dealers
• [Guardian's Image] must be killed quickly. • Interrupt [Frostbite] whenever possible.
Healers
• [Guardian's Image] inflicts heavy groupwide damage until all 3 images are killed.
Tanks
• [Piercing Missiles] inflicts significant damage to the tank.
Piercing Missiles
Inferno Bolt
Frostbite
Focused Power
When the Shade of Medivh reaches full mana he unleashes one of his powerful abilities.
Ceaseless Winter
Flame Wreath
Guardian's Image
Guardian's Image
Arcane Bolt
Shimmer

Mana Devourer

Copied!

Rarely does the sight of a mana wyrm cause a seasoned adventurer concern. These small, simple creatures float about, consuming stray pockets of arcane energy. But in Karazhan, tables are often turned, and what at first glance appears harmless may be revealed as an enormous threat.

Overview
When threatened, the Mana Devourer attacks its enemies with a variety of area effect attacks. Periodically during combat, the Mana Devourer will [Coalesce Power],expelling all of its mana as [Loose Unstable Mana]. Players will need to collect the [Loose Mana] before it reaches the Mana Devourer. After collecting the [Unstable Mana], the players need to clear its stacks by standing in [Energy Void]. If the Mana Devourer should ever reach full mana it will cast [Decimating Essence], most likely killing the entire party.
Damage Dealers
• Absorb [Loose Mana] before it gets to the Mana Devourer to keep the Mana Devourer from reaching full mana and casting [Decimating Essence]. • Use [Energy Void] to remove stacks of [Unstable Mana].
Healer
• Absorb [Loose Mana] before it gets to the Mana Devourer to keep the Mana Devourer from reaching full mana and casting [Decimating Essence]. • Use [Energy Void] to remove stacks of [Unstable Mana].
Tanks
• Absorb [Loose Mana] before it gets to the Mana Devourer to keep the Mana Devourer from reaching full mana and casting [Decimating Essence]. • Use [Energy Void] to remove stacks of [Unstable Mana].
Decimating Essence
Energy Discharge
Coalesce Power
Loose Mana
Unstable Mana
Energy Void
Arcane Bomb

Viz'aduum the Watcher

Copied!

The all-seeing Viz'aduum was commanded by Kil'jaeden to capture Karazhan and tap into the tendrils of ley energy woven through the tower. Should he succeed in anchoring the structure to the myriad of worlds held by the Legion, the Dark Titan's army will overrun Azeroth and leave little more than a smoldering husk.

Overview
Upon reaching 66% and 33% health, Viz'aduum the Watcher will open a [Demonic Portal] to retreat to a nearby Legion Command Ship.
Damage Dealers
• During the initial phase, lead the [Fel Beam] away from your allies. • Avoid taking damage from the Legion Command Ship's [Bombardment]. • While on a Legion Command Ship, avoid being knocked off by [Disintegrate]. • In the final phase, prevent [Stabilize Rift] from completing.
Healers
• During the initial phase, lead the [Fel Beam] away from your allies. • Avoid taking damage from the Legion Command Ship's [Bombardment]. • While on a Legion Command Ship, avoid being knocked off by [Disintegrate].
Tanks
• Avoid taking damage from the Legion Command Ship's [Bombardment]. • While on a Legion Command Ship, avoid being knocked off by [Disintegrate]. • In the final phase prevent [Stabilize Rift] from completing.
Stage One: Netherspace
Viz'aduum the Watcher periodically commands the nearby legion ships to assault his enemies.
Command: Fel Beam
Command: Bombardment
Chaotic Shadows
Explosive Shadows
Disintegrate
Burning Blast
Stage Two: Command Ship
Viz'aduum the Watcher retreats to the nearby Fel Beam Command Ship.
Command: Bombardment
Burning Blast
Chaotic Shadows
Explosive Shadows
Disintegrate
Soul Harvest
Stage Three: The Rift!
Viz'aduum the Watcher retreats to the nearby Bombardment Command Ship and calls in allies from the Rift above.
Stabilize Rift
Burning Blast
Chaotic Shadows
Explosive Shadows
Disintegrate
Felguard Sentry
Blazing Hamstring
Fel Flame Spitter
Shadow Phlegm