Assault on Violet Hold

Assault on Violet Hold

Dungeon ID: 777

Legion · Dungeon · Requires level 45

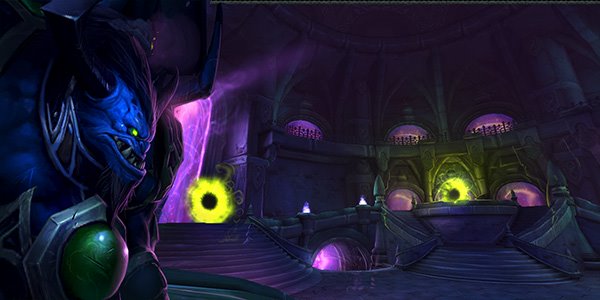
In the aftermath of the Northrend campaign and the Blue Dragonflight's attack on this Dalaran prison, the Violet Hold was repaired and its cells were repurposed to house some of the most dangerous servants of the Lich King. Now, as Dalaran floats above the Broken Isles as the flagship of the war against the Legion, a shadowy threat once again seeks to strike at Kirin Tor from within.

Encounters

Blood-Princess Thal'ena

Copied!

Blood-Princess Thal'ena is the daughter of the powerful San'layn Queen Lana'thel. She has been locked inside Violet Hold since the Northrend campaign, suffering the gnawing pain of her eternal hunger. Now that her cell has opened, she intends to feed on the world.

Overview
Blood-Princess Thal'ena immediately uses [Vampyr's Kiss] to infect an enemy with [Essence of the Blood Princess]. When [Essence of the Blood Princess] wears off, the victim has a short amount of time to infect another target. If they cannot do so, they submit to [Uncontrollable Frenzy].
Damage Dealers
• When infected with [Essence of the Blood Princess] all your damage is increased.
Healers
• Every player infected with [Essence of the Blood Princess] increases the damage of [Shroud of Sorrow].
Tanks
• Move Blood-Princess Thal'ena out of the blood pool when she casts [Blood Swarm].
Blood-Princess Thal'ena
Vampyr's Kiss
Essence of the Blood Princess
Frenzied Bloodthirst
Uncontrollable Frenzy
Shroud of Sorrow
Blood Swarm
Blood Call
Congealed Blood
Summoned from existing blood pools in the area. Immediately begins making its way towards the Blood-Princess.
Eternal Hunger

Festerface

Copied!

Professor Putricide had many experiments seized when Icecrown Citadel fell. At best guess, Festerface appears to be a failed prototype that predated the construction of the professor's two most notorious creations: Rotface and Festergut.

Overview
Festerface spews torrents of nasty bile that form into Congealed Goo. When a Congealed Goo is killed it begins to reform and will fully heal after a few seconds. During this time, Festerface can consume the Congealed Goo if he is brought close to it.
Damage Dealers
• Avoid standing in front of Festerface while he casts [Congealing Vomit]. • Quickly kill Congealed Goo to trigger [Recongealing].
Healers
• Avoid standing in front of Festerface while he casts [Congealing Vomit]. • Each Congealed Goo increases the damage the party takes from [Fetid Stench].
Tanks
• Avoid standing in front of Festerface while he casts [Congealing Vomit]. • Move Festerface to any Congealed Goo that is currently [Recongealing] so he can consume the Goo. • After consuming a Congealed Goo Festerface will gain [Yum!].
Festerface
Congealing Vomit
Congealed Goo
Fetid Stench
Recongealing
Yum!
Uh Oh...
Black Bile
Necrotic Aura

Shivermaw

Copied!

Rumored to be one of Sindragosa's own brood, this fearsome frost wyrm was captured from the Frostwing Halls of Icecrown Citadel, where the forces of the Lich King labored to create these winged abominations.

Overview
Shivermaw uses powerful Frost magic, forcing players to move between the upper and lower sections of the prison to avoid [Relentless Storm] and [Ice Bomb].
Damage Dealers
• [Wing Buffet] and [Tail Sweep] knock players back if they are in front of or behind Shivermaw. • Free players from Ice Blocks if they are hit by [Ice Bomb].
Healers
• Tank movement speed is considerably slowed unless [Frost Breath] is dispelled. • [Ice Bomb] inflicts heavy damage to the entire group.
Tanks
• [Frost Breath] inflicts heavy damage and slows movement speed. • [Wing Buffet] periodically knocks back all players in front of Shivermaw.
Frost Breath
Tail Sweep
Wing Buffet
Relentless Storm
Ice Bomb
Frigid Winds

Anub'esset

Copied!

Anub'esset, one of the few remaining ancient Nerubian crypt lords, was captured by the Kirin Tor during the invasion of Icecrown Citadel and imprisoned in Violet Hold. Set free during the Legion's invasion, his thoughts turn only to revenge against the living.

Overview
Anub'esset attacks the party and calls scarabs and beetles to assist him in battle. Players must quickly eliminate his minions before becoming overwhelmed.
Tank
• [Mandible Strike] deals heavy damage and reduces your healing taken for a short time. • [Impale] creates spikes in front of Anub'esset, which should be avoided.
Healer
• [Mandible Strike] deals heavy damage to the Tank and reduces their healing taken for a short time. • If Spitting Scarabs are not killed quickly, their [Poison Spit] will deal heavy damage. • When targeted by [Impale], move away from other players to avoid damaging them.
Damage Dealers
• Quickly kill Spitting Scarabs after they are spawned by [Call of the Swarm]. • When targeted by [Impale], move away from other players to avoid damaging them.
Mandible Strike
Impale
Call of the Swarm
Spitting Scarab
Poison Spit
Blistering Beetle
On Heroic difficulty, Blistering Beetles will burrow into the fight, fixating on nearby players. When they come into contact with a player or die, they will explode, creating a pool of Blistering Ooze.
Blistering Ooze

Millificent Manastorm

Copied!

An engineering genius of undeniable prowess, Millificent Manastorm seems to be the complete opposite of her husband Millhouse. Smart and resourceful, she is a force to be reckoned with.

Overview
Once released from her magical prison cell, Millificent Manastorm uses her technological gadgets to overpower her enemies.
Damage Dealers
• Disarm the [Elementium Squirrel Bombs] so that they don't explode. • Destroy the unarmored [Thorium Rocket Chickens] to prevent them from overwhelming the party with rockets.
Healers
• Disarm the [Elementium Squirrel Bombs] so that they don't explode. • Avoid [Rocket Chicken Rockets] to prevent being knocked around.
Tanks
• Disarm the [Elementium Squirrel Bombs] so that they don't explode. • Destroy the unarmored [Thorium Rocket Chickens] to prevent them from overwhelming the party with rockets.
Delta Finger Laser X-treme
Stage One: Gadgets Unleashed
Elementium Squirrel Bomb
Explosion!
Bomb Squirrel Bomb
Thorium Rocket Chicken
Rocket Chicken Rocket
Chicken Swarm Rockets
Stage Two: A Gnome Scorned!
Overloaded Elementium Squirrel Bomb
Explosion!
Bomb Squirrel Bomb
Reinforced Thorium Rocket Chicken
Rocket Chicken Rocket
Chicken Swarm Rockets
Thorium Plating

Mindflayer Kaahrj

Copied!

This eldritch creature was captured in the depths of Ulduar, ensared as it lapsed into a catatonic state after the defeat of Yogg-Saron. Since Dalaran arrived at the Broken Isles, the monstrosity has mysteriously awakened, and only the powerful wards of the Violet Hold keep its powers in check.

Overview
Mindflayer Kaahrj attacks the party with his Shadow Crash and Hysteria spells. At 80% and 40% health, Mindflayer Kaahrj casts Eternal Darkness, ushering in a swathe of Faceless Tendrils to repeatedly damage party members.
Damage Dealers
• Avoid [Shadow Crash]. • Defeat Faceless Tendrils summoned by [Eternal Darkness].
Healers
• Avoid [Shadow Crash]. • Be aware that tanks take significant damage from [Doom].
Tanks
• Avoid [Shadow Crash]. • [Doom] inflicts significant damage.
Eternal Darkness
Amplified Darkness
Shadow Crash
Collapsing Shadows
Hysteria
Doom

Fel Lord Betrug

Copied!

This ruthless Legion commander stands ready to lead an invasion of Dalaran from within its walls.

Overview
Fel Lord Betrug periodically sends players flying to the extreme sides of the Violet Hold. One of these players is chosen for Execution and must be freed or else they will die.
Damage Dealers
• Stay away from players that are targeted with [Fel Slash]. • If you are the target of [Fel Slash] position yourself to not hit your allies. • When Fel Lord Betrug begins executing one of your allies, hurry to cross the room and free them.
Healers
• Stay away from players that are targeted with [Fel Slash]. • If you are the target of [Fel Slash], position yourself to not hit your allies. • When Fel Lord Betrug begins executing one of your allies, hurry to cross the room and free them.
Tanks
• Stay away from players that are targeted with [Fel Slash]. • If you are the target of [Fel Slash] position yourself to not hit your allies. • When Fel Lord Betrug begins executing one of your allies, hurry to cross the room and free them.
Mighty Smash
Execution
Chaotic Energy
Fel Slash
Seed of Destruction
Wake of Destruction

Sael'orn

Copied!

These origins of these arachnid demons are not fully understood - scholars who have studied the Legion speculate that they are the remnants of a forgotten race on a world long ago conquered by the armies of Sargeras. Sael'orn is a particularly vicious specimen, and has been tasked with leading the infiltration of Dalaran.

Overview
Sael'orn pulls her enemies close to her while attacking them with viscious short ranged attacks. Periodically, her invulnerable phase spider guardians join the fight, attacking enemies foolish enough to turn their backs.
Damage Dealers
• Face any Phase Spider that targets you with [Creeping Slaughter] to stop them from approaching.
Healers
• Face any Phase Spider that targets you with [Creeping Slaughter] to stop them from approaching.
Tanks
• Face any Phase Spider that targets you with [Creeping Slaughter] to stop them from approaching.
Sael'orn
Venom Spray
Web Grab
Fel Detonation
Toxic Blood
Phase Spider
Creeping Slaughter